|
|
|
Kto jest w sklepie?
Sklep przegląda 5626 gości |
|
Kategorie
|
|
Informacje
|
|
Polecamy
|
|
|
 |
|
|
Dla tego produktu nie napisano jeszcze recenzji!
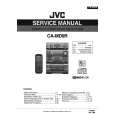
CD Direct Recording
Everything on the CD goes onto the tape in the order it is on the CD, or according to the order you have set in a program. You can even record in Random Play. In this case, the tracks of the 3 CDs are recorded randomly on the tape.
1. 2.
Prepare CDs. (See page 19.) Check that the CD Player is not playing a CD. Insert a blank or erasable cassette in the cassette holder. t When you want to record on both sides of a tape, press the button to turn on the auto reverse mode. In this case, press the � button then the 7 button to start recording in the forward (�) direction. Press the CD REC button. �CD � TAPE� appears on the display then the unit plays the CD and starts recording. At the end of the tape, the CA-MD9R automatically goes back to the beginning of the last selection and re-records it, this time gently fading out at the end. If you have the auto reverse mode, the reverse side starts with the last selection of the front side. The last selection of the reverse side will also fade out at the end. (A 10 second blank is created at the beginning of the reverse side.) When the recording is finished, the CD Player and Cassette Deck stop. Fade out Front side Reverse side
1 9 2 8 3 7 4 6 5 5
3.
CD REC
Fade out
10 sec. blank
To stop recording, press the 7 button on the Cassette Deck or CD Player (or the 7 button on the Remote Control). Notes: � When recording from a CD program (or random play) made from more than one CD, the tape will pause when the unit switches to another CD. Then, when the CD is ready, the unit releases the pause and continue the recording. � When making Sleep Timer setting while doing CD Direct recording, set the time so that there is enough leeway to finish the recording before the power goes off. If the time is set to about the length of the CD, the power may go off before recording finishes. � For CD Direct Recording using more than one CD, use a blank tape. If you use a prerecorded tape, prerecorded sound may not be erased between newly-recorded tracks.
|
|
|
> |
|